As a watercolour landscape painter who simply 'tries to paint what and how she sees', the subject of using hard and soft / lost and found edge techniques to create a 3 dimensional world on a 2 dimensional surface is at the centre of my practice. For me there is a direct link between the use of 'edges' and the way we see. Wherever we focus our eyes and our mind we see clean crisp edges that define an object within its environment. In a painting, however, it is up to the artist to create a focal point and lead the viewers eye towards it, ultimately releasing the eye and completing the viewers' journey. We usually think of a focal point as being established first through composition, but it can also be done by the use of edges. Creating a limited amount of crisp, hard edges and balancing these with soft or even invisible ones helps to direct the viewers eye and create the sensation of 'how' we see.
Edges refer to where one shape ends and another begins. This isn't limited to separate objects, but also a gradation of colour and variances in shading. Edges can be broken down into 4 categories: hard and soft, lost and found.
In all forms of painting hard or found edges are created by placing one colour or tone over or next to another; and soft edges are created by blending one colour or tone with or into another to a greater of lesser extent. However, in watercolour we have another type of hard edge, particular to the medium, where wet paint has dried and created a slightly darker ring around the outside edge of a mark. This happens in watercolour because the paint granules gravitate towards the edge of the meniscus of the watermark as it dries. This only really happens with watercolour and some very liquid inks when the nature of the medium's component parts are not consistent or stable within the liquid. Lost and soft edges can refer to areas, for example, when the edge of a subject / object isn't visible - deliberately painted this way to allow the brain, as it were, to enjoy 'completing the picture'. To summarise therefore, lost and found, hard and soft edges appear in watercolour and can be used to create the illusion of distance, depth and to direct the eye towards a focal point or centre of interest.
As distance increases not only do we lose the colour yellow and then red from our visual field (the ability to see these colours decreases, which is why distance appears more grey, towards the blue side of the colour wheel), but we also lose the ability to see detail, edges become visually soft, they blur and are eventually lost, until we are left with softer whole shapes. So in watercolour, being able to use a vocabulary of lost and found / hard and soft edge techniques, gives us the ability to create the illusion, on a 2 dimensional surface, of a 3 dimensional world - the way we see it!
Techniques:
Hard or found edges appear in watercolour simply by applying paint to dry paper and allowing them to dry. Soft or lost edges in their simplest form are created by using a wet in wet approach, but here they are simply suggestive and lack structure.
Therefore I will focus on techniques you can use that follow 2 strands:
· Creating a hard or found edge, then softening or losing it to suggest the natural blurring of distance.
· Creating different types of soft or lost edges that create depth in a 3 dimensional world.
Softening or losing a hard edge to create distance:
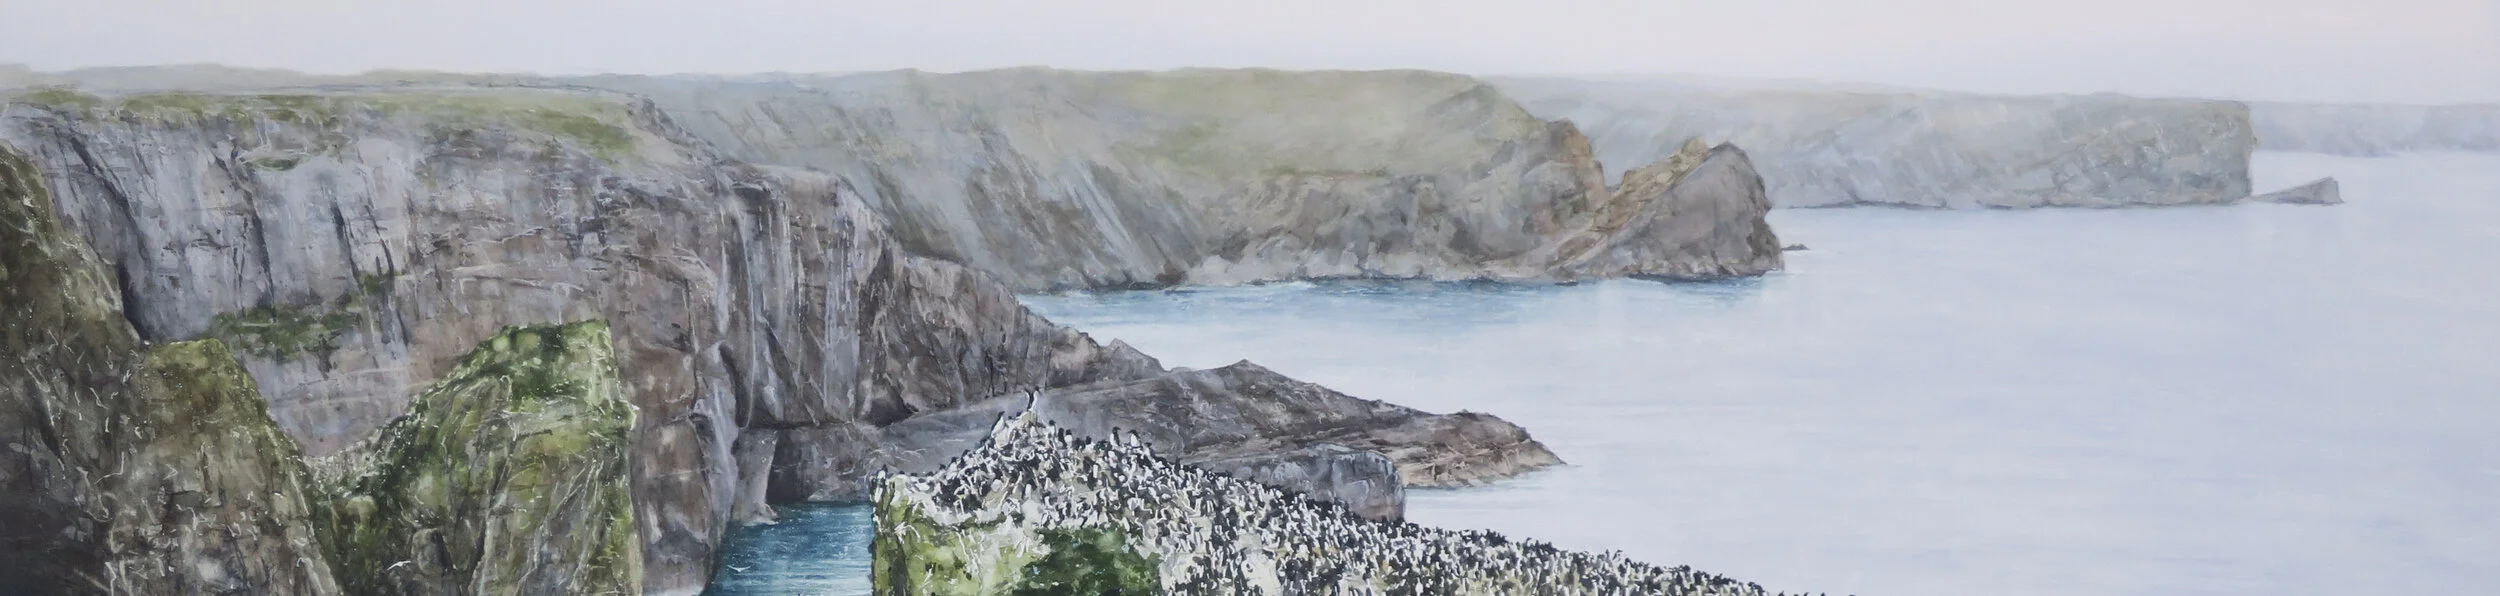
To create whole retained shapes in the distance that have lost detail we need to first paint the shape and then lose it. I do this by painting the structure in as much detail as I can see naturally and allowing it to dry, taking care to use the best match for colour and tone. Once dry I tilt my painting and wash the surface with clean water, allowing the water to progress downwards. This softens and washes away the darker ring around the outside edge of the marks. In the example above, a detail of 'Guillemots, Sea beet and Tree Mallow', this has been done with each headland, matching colour and tone until I arrive at the foreground structures that will keep their hard edges. Only then I paint the sky over the whole area, essentially dropping all of the cliffs back behind a grey / violet glaze.

The example above, a detail of 'From The Eye', illustrates a similar use of washing out hard edges, almost completely as the view disappears into the sun, using a wide range of tones to exploit the contrast, creating almost infinite distance.
Creating lost or soft edges that suggest structured depth:
The image, 'From The Eye', also gives an example of creating depth using soft edges at the point where the Thames meets the embankment on the left. We don't see a line where the water meets the wall below the trees, neither do we see hard edges to the reflections in the water of the towers, trees or walls above. These soft edges have been created by applying the darkest shadow colour to where the edge 'should' be with the board tilted and then quickly running that colour both up down with a large brush loaded with clean water, to mirror the structure above. As the board is tilted the softened edge will have more of a downward drag of colour, with minimal paint travelling upwards, against gravity. The fact that we don't see an edge as such allows the brain to complete the picture and understand what is going on. Here we allow painting what we see without revision to override what we know about the structure, that water meets a wall, where we think, or 'know', there must be a line where they touch.
The following example of silhouetted trees against a misty lake, again uses the technique of creating almost invisible edges to the far banks, with darker paint added below structures and washed down with clean water. Here I have also used the technique of lifting dry paint from the picture surface using a damp chisel brush and tissue to create soft edges. On the water surface in the bottom right hand corner around the coot, once the painted surface is dry, I have used a damp chisel brush to draw the suggestion of concentric circles, stamping away the damp paint with a tissue to create the illusion of movement. By using a strong contrast between the totally soft edged background and the hard edged silhouetted foreground tree and branches painted wet on dry, I give the illusion of depth and distance, an internal space within the picture.

The painting of St Paul's from the Millennium Bridge, 'Time present, time past', illustrates how to lose edges, create soft edges and at the same time use hard edges to lead to eye to the focal point. The soft edges are used on the reflective surface of the bridge by painting wet into wet initially, strengthening the colour at the bottom. The painting has been turned upside down to apply a further dark wash, run out with clean water to achieve the depth of colour. Once dry the surface has been structured by lifting off horizontals and verticals as previously described with a damp chisel brush, creating a flat surface of shadows and reflections. The top edges of the buildings , left and right, have been softened dramatically with the application of a thick dark wash over the previously painted walls, dropping them into deep shadow. By painting this dark wash around St Paul's, leaving a crisp hard edge, the eye is directed to the focal point assisted by the diagonals in the composition.

The way we see is something which continues to fascinate me. Balancing the use of hard and soft, lost and found edges is just one of the processes that allows me to create the illusion of reality.